deguzzi
New Member
- Thread starter
- #1
After going back and forth multiple threads across various forums, I'd like to consolidate the info I've gathered into one post regarding OEM fog lights and an OEM turn signal stalk for the 11th gen Civic.
NOTE: This will not be a step-by-step guide, and I will assume you have basic automotive electrical knowledge.
Let me begin by HIGHLY suggesting getting an aftermarket fog light solution (mikstoreph, SWA Auto Sports, etc) with H8/H11 bulbs instead of OEM.
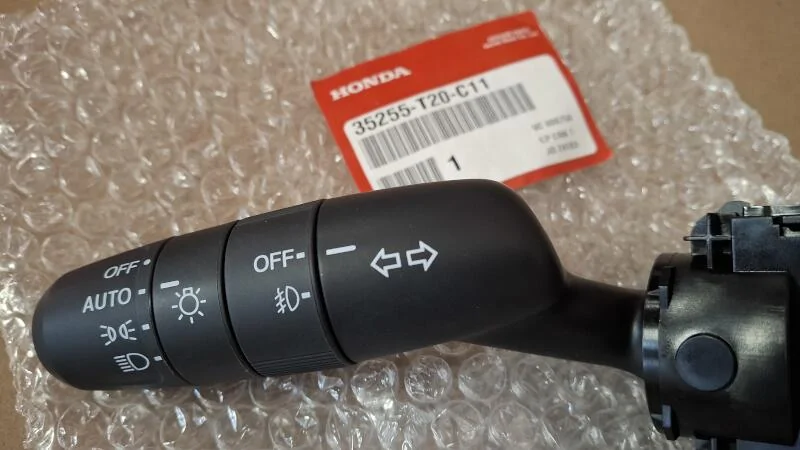
With that out of the way, here are the OEM part numbers:
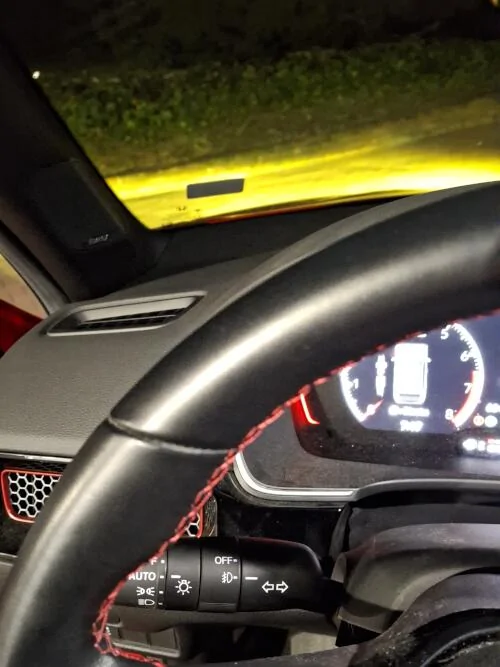
- Turn signal stalk with fog light switch: 35255-T20-C11
- OEM LED driver side fog light: 33950-T20-A01
- OEM LED passenger side fog light: 33900-T20-A01

Beginning with the switch, you'll want to release the softer plastic cover on the back of the housing that exposes the wiring. You'll be looking for the tan/brown wire which you can either de-pin, cut, or tap into:

Brown wire on the very right
I decided to de-pin it in order to route it outside of the housing like so:

This will control your relay's signal ground.
For the relay's signal power, I found a low amp fuse that is only powered with ignition ON and used a fuse tap. I forget exactly which slot I used, but one forum post suggested #44--double check with a DMM to verify.
I crimped a black wire to the switch's brown wire, and used a bullet connector to run red wire from the fuse tap. I ran these long enough to exit the cabin, through a grommet and parallel with the hood release cable, the into the engine bay wherever you decide to place your relay.
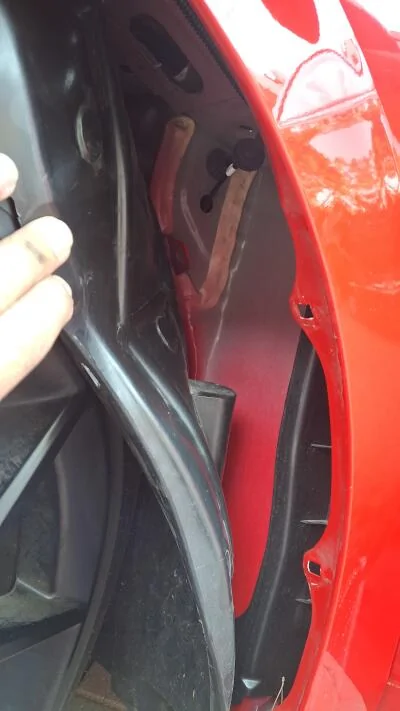
The fender doesn't have to come off, but if you release the fender liner behind the wheel, you'll have access to the grommet:

These two wires will connect to the coil circuit of the relay.
For the wiring to the fog lights, I grounded the circuit by bolting an eyelet terminal in an open hole next to the car's body ground.
Then I ran power from one of the 2 bolts in the engine bay fuse box, through an in-line fuse, to the 30 contact (relay load, power input).
The output, 87 contact, connects to the positive wires of my fog lights and completes the circuit.
I used this waterproof relay kit for reference:
https://www.theretrofitsource.com/morimoto-diy-relay-kit-A-RELAYKIT
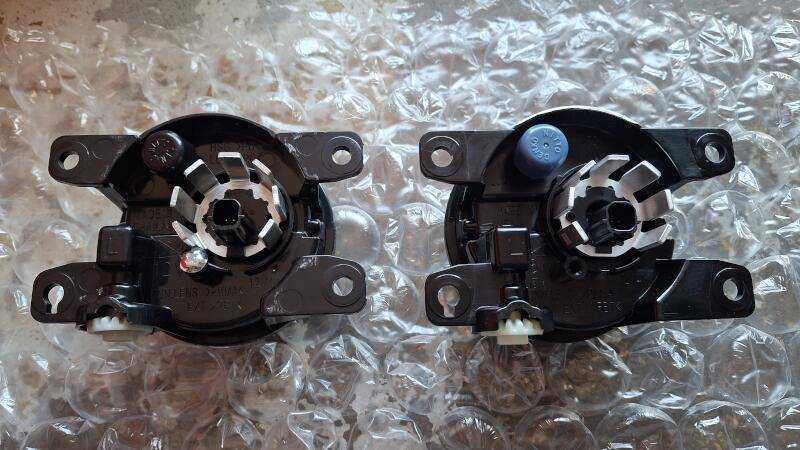
If you decide to make your own harness or try to find one on eBay/Amazon to use, look for a harness with these connectors:
Again, they are L1B.
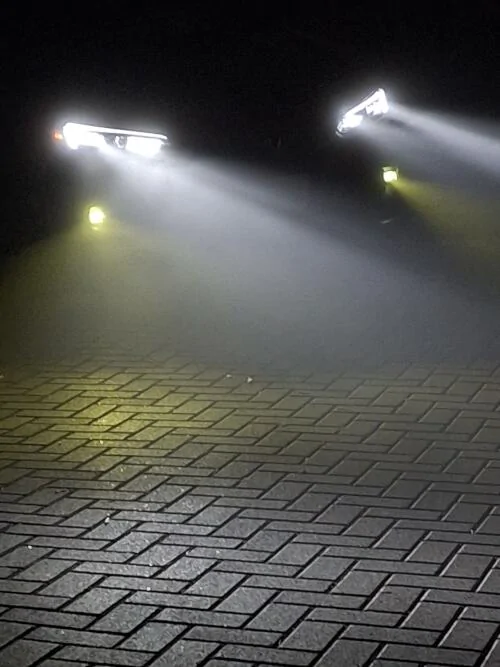
Now for the after pictures:
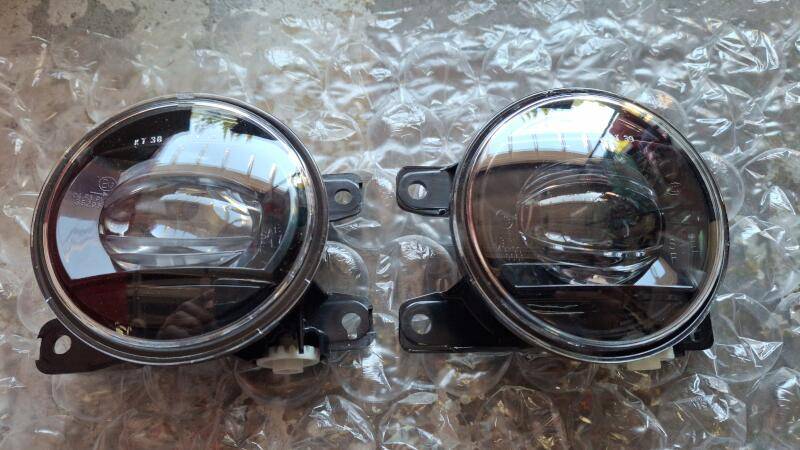
And some comparison pictures of the eBay kit I bought (left) vs OEM (right):
Visually, very accurate, but side-by-side the differences stand out. As well as the "Made in ____" vs "Made in USA" of course.
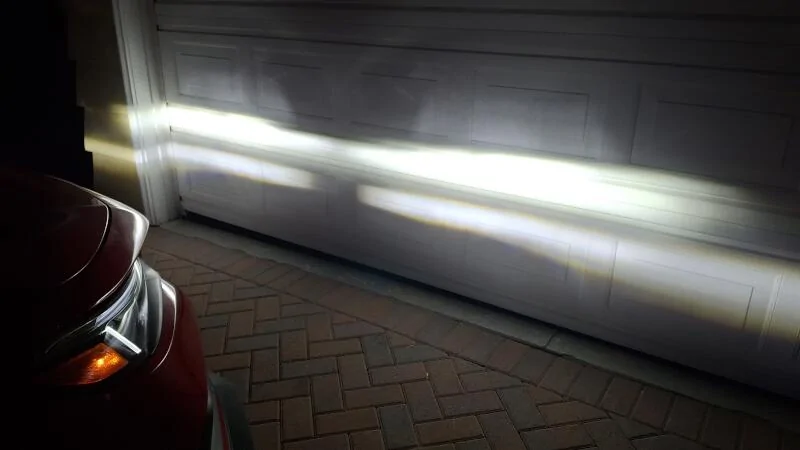
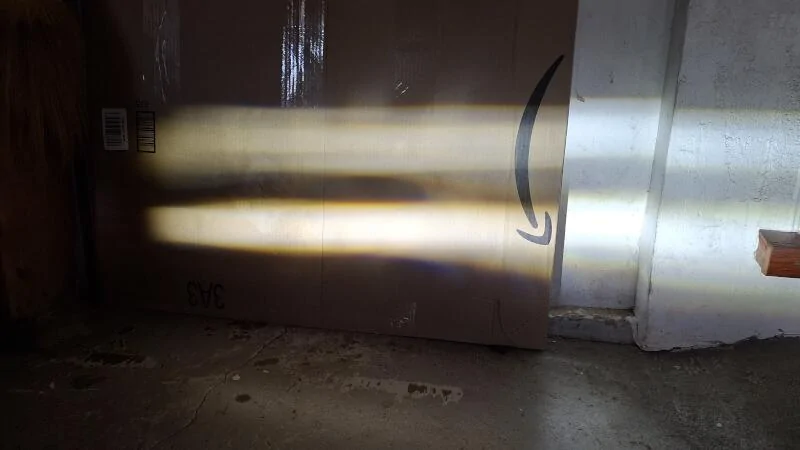
But the OEM beam is MILES better:
eBay on top, OEM below
NOTE: This will not be a step-by-step guide, and I will assume you have basic automotive electrical knowledge.
Let me begin by HIGHLY suggesting getting an aftermarket fog light solution (mikstoreph, SWA Auto Sports, etc) with H8/H11 bulbs instead of OEM.
- It's cheaper (fog lights, switch, harness, relay included)
- H11 is a very common bulb to find in different colors in your preferred bulb type (halogen/HID/LED)
With that out of the way, here are the OEM part numbers:
- Turn signal stalk with fog light switch: 35255-T20-C11
- OEM LED driver side fog light: 33950-T20-A01
- OEM LED passenger side fog light: 33900-T20-A01
Beginning with the switch, you'll want to release the softer plastic cover on the back of the housing that exposes the wiring. You'll be looking for the tan/brown wire which you can either de-pin, cut, or tap into:
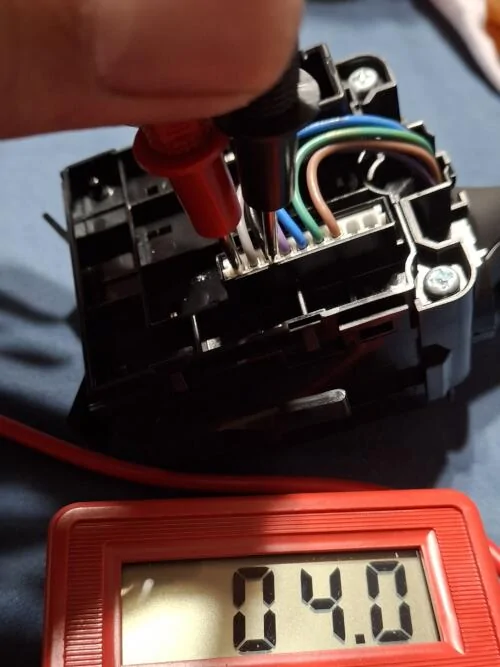
Brown wire on the very right
I decided to de-pin it in order to route it outside of the housing like so:
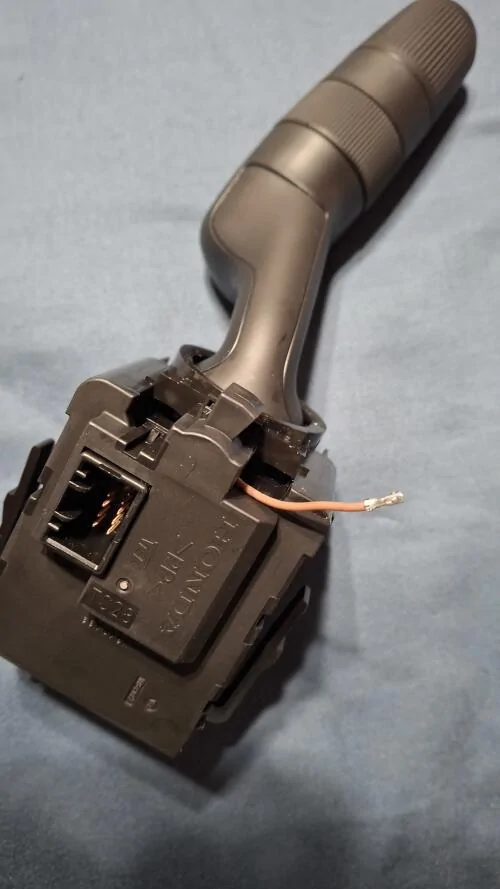
This will control your relay's signal ground.
For the relay's signal power, I found a low amp fuse that is only powered with ignition ON and used a fuse tap. I forget exactly which slot I used, but one forum post suggested #44--double check with a DMM to verify.
I crimped a black wire to the switch's brown wire, and used a bullet connector to run red wire from the fuse tap. I ran these long enough to exit the cabin, through a grommet and parallel with the hood release cable, the into the engine bay wherever you decide to place your relay.
The fender doesn't have to come off, but if you release the fender liner behind the wheel, you'll have access to the grommet:

These two wires will connect to the coil circuit of the relay.
For the wiring to the fog lights, I grounded the circuit by bolting an eyelet terminal in an open hole next to the car's body ground.
Then I ran power from one of the 2 bolts in the engine bay fuse box, through an in-line fuse, to the 30 contact (relay load, power input).
The output, 87 contact, connects to the positive wires of my fog lights and completes the circuit.
I used this waterproof relay kit for reference:
https://www.theretrofitsource.com/morimoto-diy-relay-kit-A-RELAYKIT
If you decide to make your own harness or try to find one on eBay/Amazon to use, look for a harness with these connectors:
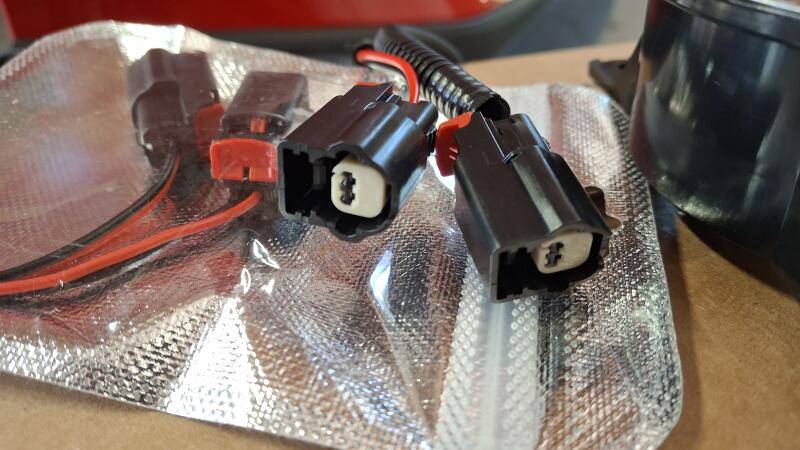
Again, they are L1B.
Now for the after pictures:
And some comparison pictures of the eBay kit I bought (left) vs OEM (right):
Visually, very accurate, but side-by-side the differences stand out. As well as the "Made in ____" vs "Made in USA" of course.
But the OEM beam is MILES better:
eBay on top, OEM below