phononmode
Member
- Thread starter
- #1
Don't want to pay $70+ for a part that is meant to take damage, so decided to make my own. After many revisions and tests, finally installed my 3D printed ones on my FL5. I'd like to share some thoughts on how to get the best print.
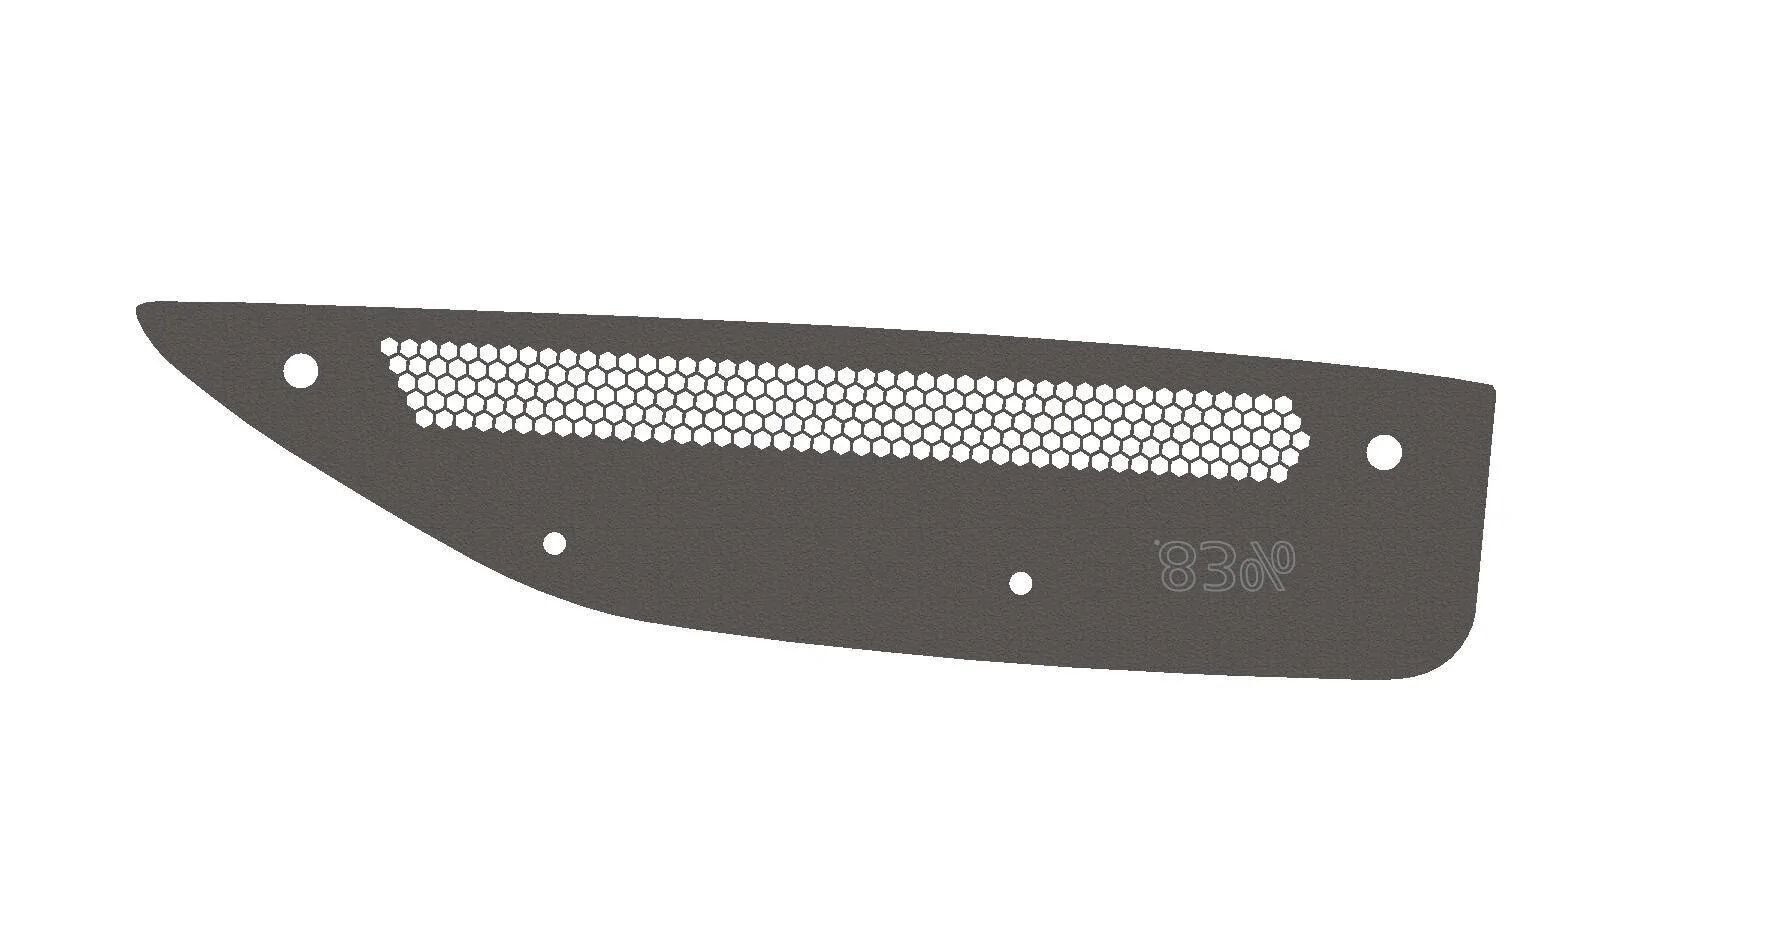
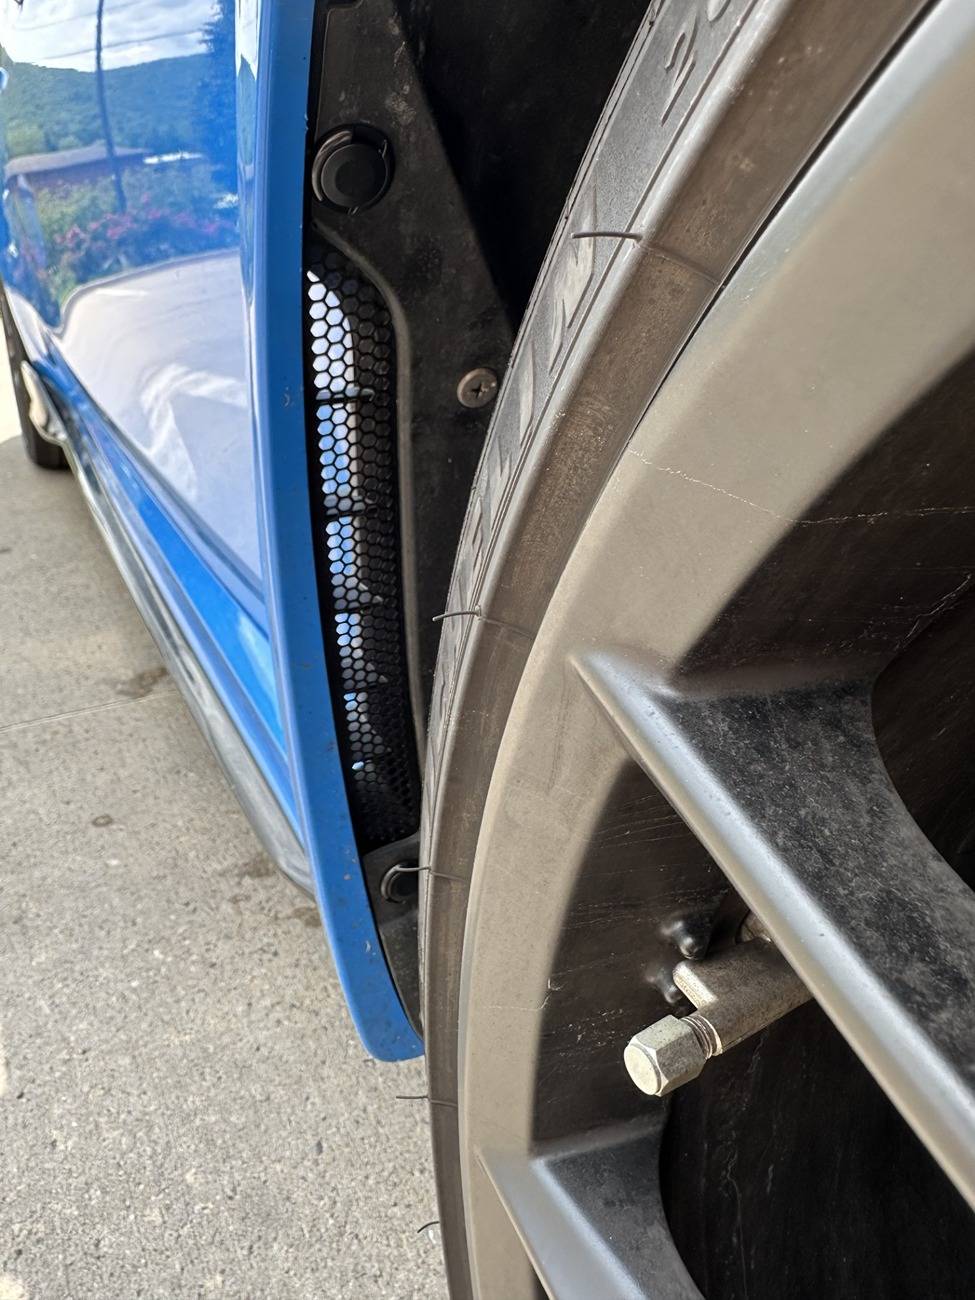
First of all, I used a paper and pencil to trace the outline of the finder vent, scanned it, then modeled it in Solidworks. I used hexagonal grids with 83% air flow area.

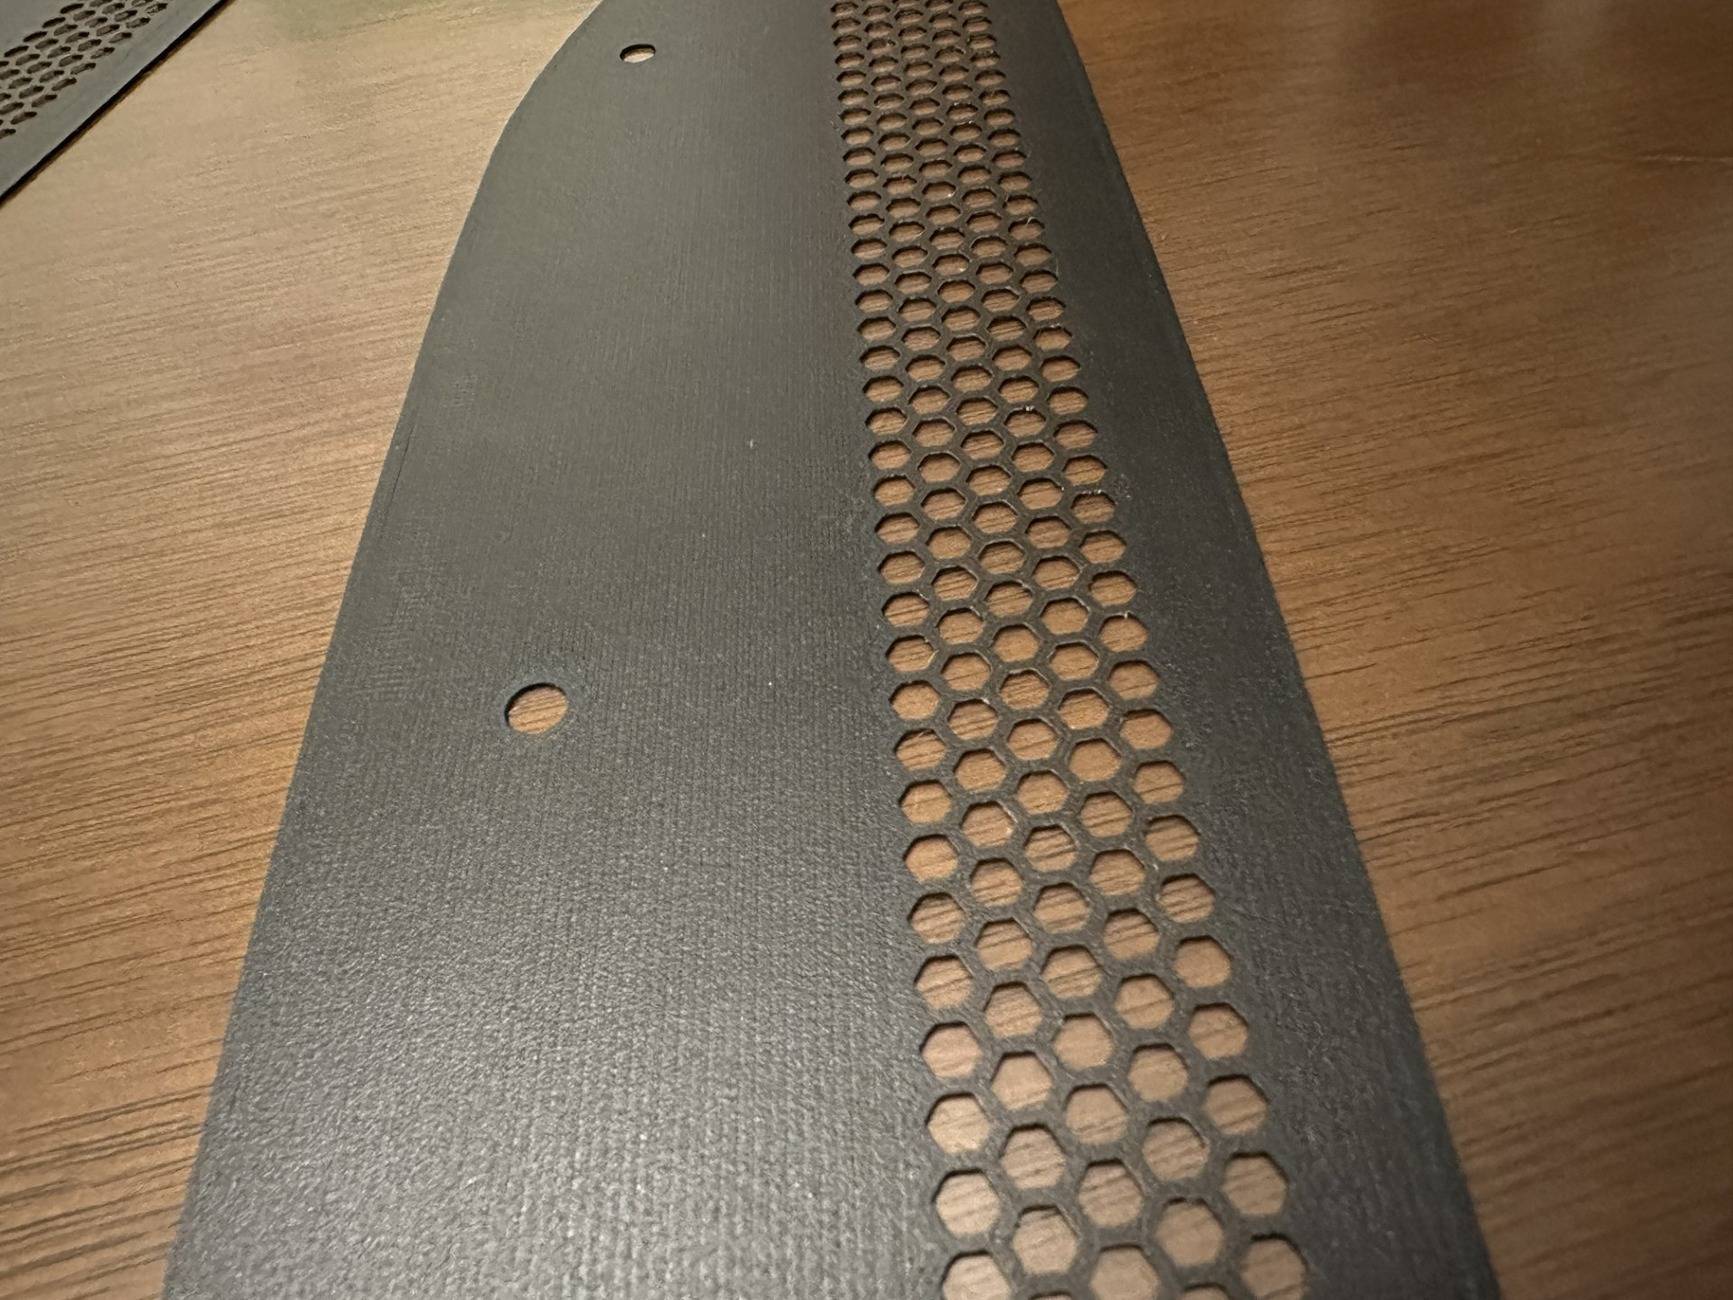
Printed out on my 3D printer with build-area of 300mm x 300mm. 4 mm nozzle size - first layer thickness of 5 mm. Since it's not really a "3D" print but rather a large area 2D sheet, you want to slow the print speed of the first layer down to ensure good adhesion to he build plate and between lines - I used 20 mm/s and 0.1 mm height for the first layer. The print turns out to be pretty good, both in strength and cosmetically.
Material used is PETG, for weather and environment resistance. Do not use PLA, it won't survive outdoor use (I've tried it).

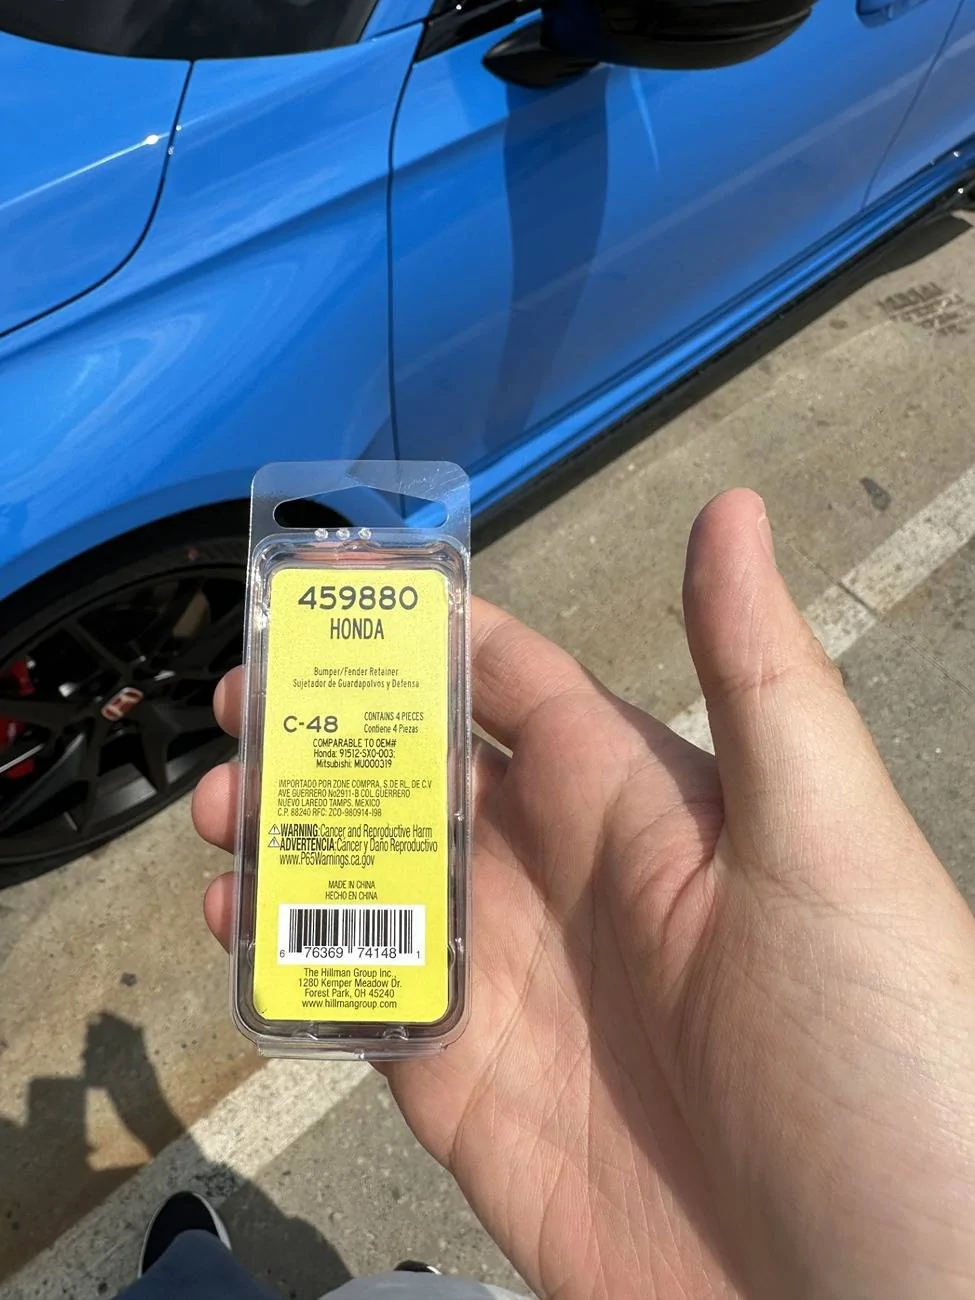
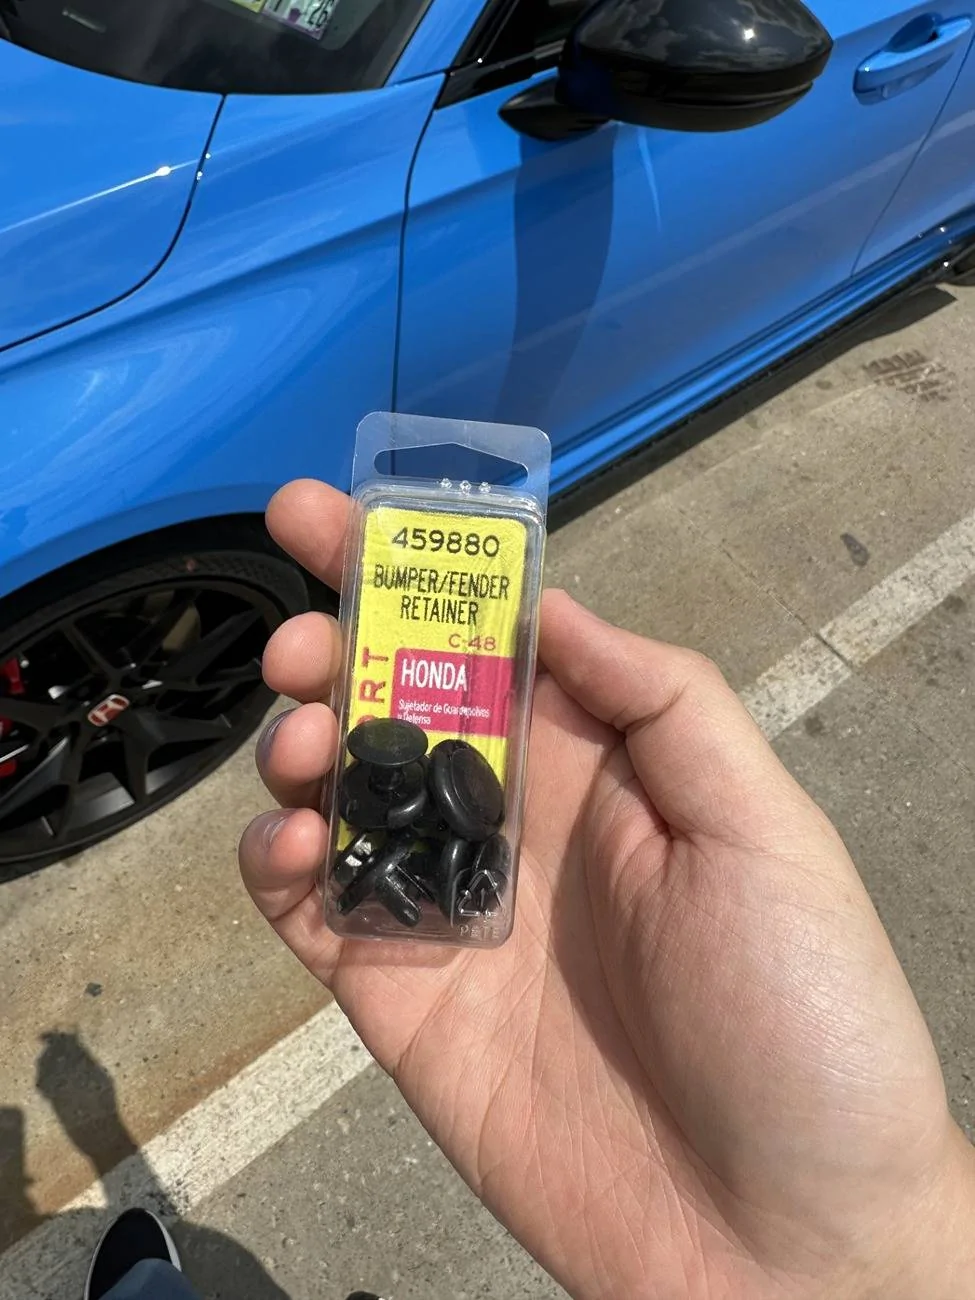
For the install, the push retainers are suuuuper difficult to remove. I suggest just use a wire cutter to destroy the clips. Do not try to preserve these clips - you risk damaging your paint if you slip and the tool strikes the panel (I caused a small chip on mine). Get new clips from your autozone.

Picture of the installed rock guard:
Final thoughts:
The material is pretty strong, I tried to intentionally break the material at 0.5 mm and it took a lot of force. I end up print 0.7 mm - that's the thickest it can go to use the push retainers above (and probably same for factory clips).
If it breaks I can just replace it since it's cheap to make. I may try to find some push retainers that are easier to remove than the factory ones. I think any 8 mm retainers can work.
First of all, I used a paper and pencil to trace the outline of the finder vent, scanned it, then modeled it in Solidworks. I used hexagonal grids with 83% air flow area.
Printed out on my 3D printer with build-area of 300mm x 300mm. 4 mm nozzle size - first layer thickness of 5 mm. Since it's not really a "3D" print but rather a large area 2D sheet, you want to slow the print speed of the first layer down to ensure good adhesion to he build plate and between lines - I used 20 mm/s and 0.1 mm height for the first layer. The print turns out to be pretty good, both in strength and cosmetically.
Material used is PETG, for weather and environment resistance. Do not use PLA, it won't survive outdoor use (I've tried it).

For the install, the push retainers are suuuuper difficult to remove. I suggest just use a wire cutter to destroy the clips. Do not try to preserve these clips - you risk damaging your paint if you slip and the tool strikes the panel (I caused a small chip on mine). Get new clips from your autozone.
Picture of the installed rock guard:

Final thoughts:
The material is pretty strong, I tried to intentionally break the material at 0.5 mm and it took a lot of force. I end up print 0.7 mm - that's the thickest it can go to use the push retainers above (and probably same for factory clips).
If it breaks I can just replace it since it's cheap to make. I may try to find some push retainers that are easier to remove than the factory ones. I think any 8 mm retainers can work.